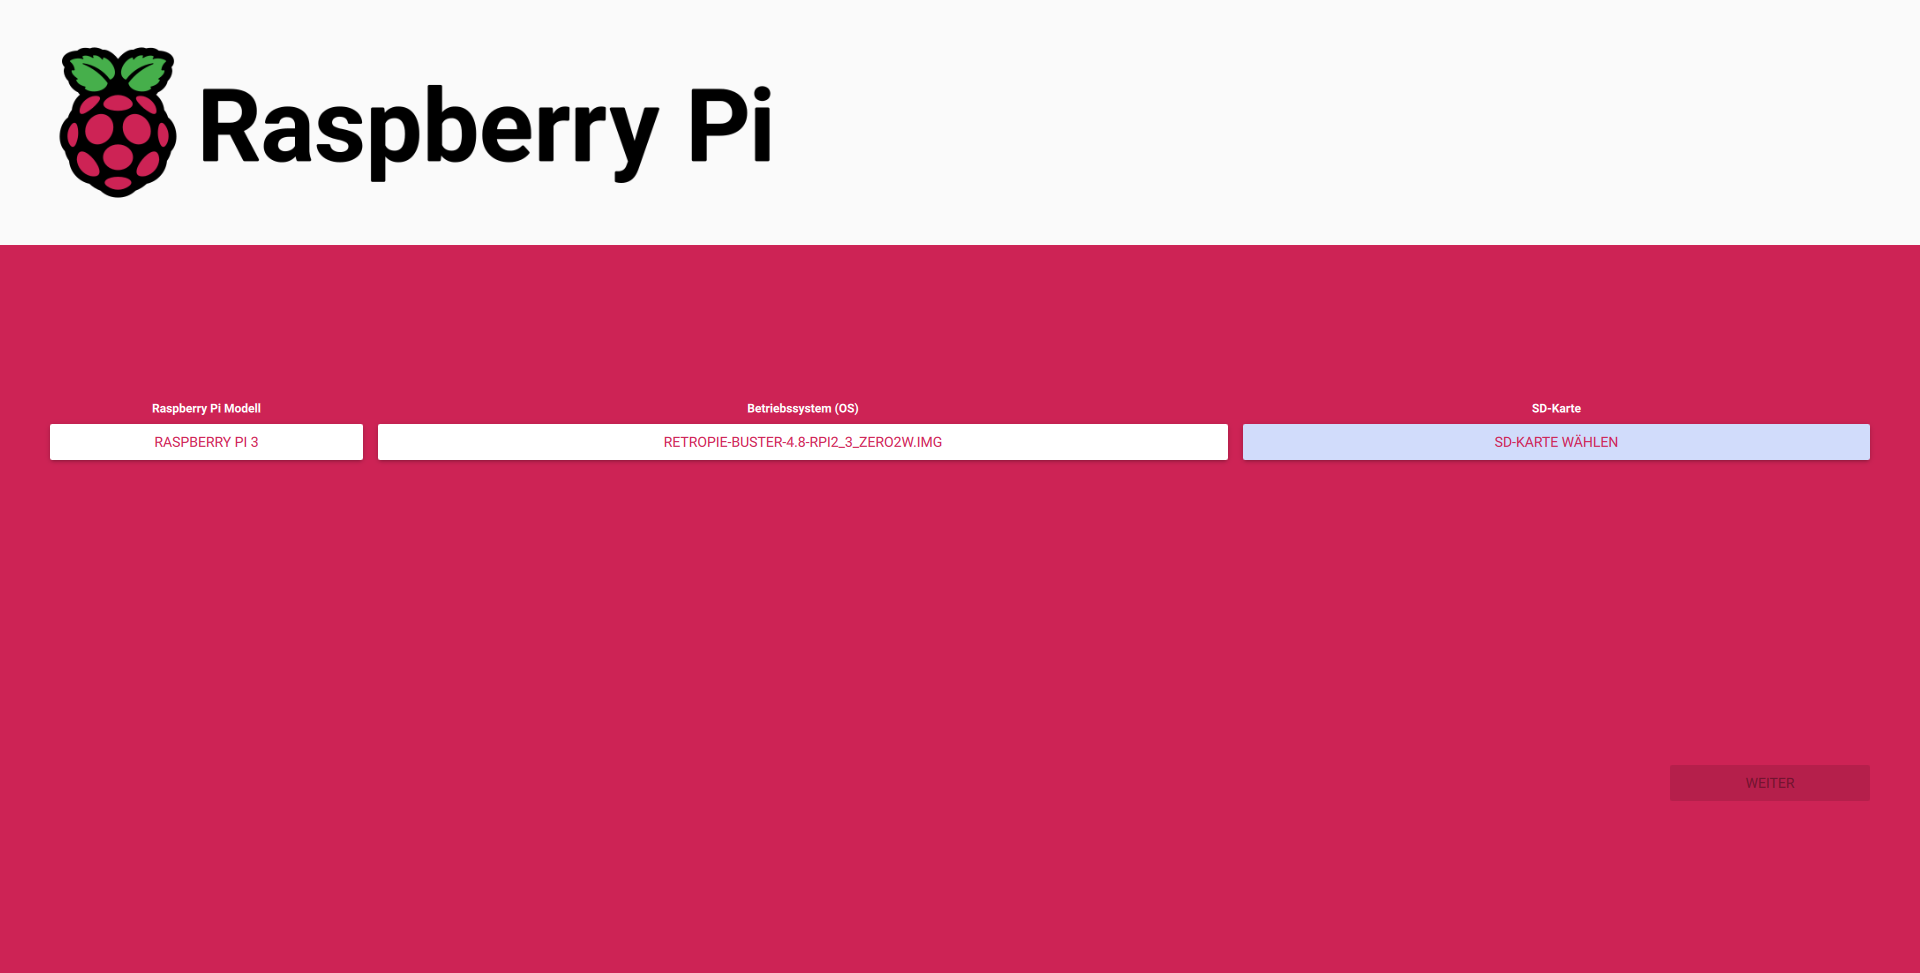
1. Flash RetroPie to the SD card using Raspberry Pi Imager and insert it into the Raspberry Pi.
2. Attach the Raspberry Pi to the display and connect the soundcard.
2.1. Align the Pi’s screw holes with the display.
2.2. Secure with mounting screws.
2.3. Insert the FPC cable into the DSI interface.
2.4. Connect the soundcard to the GPIO pins.
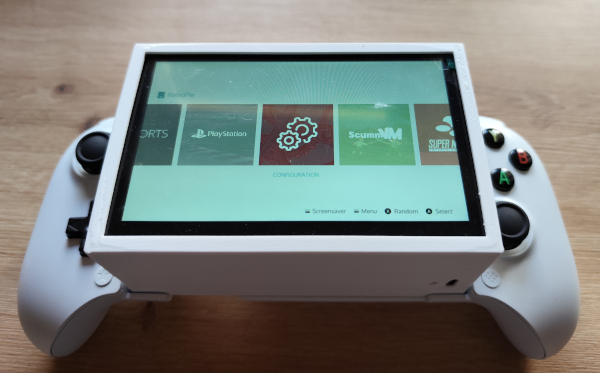
3. Plug in your keyboard, shut down EmulationStation, and configure the ALSA softvol.
4. Reboot the Raspberry Pi.
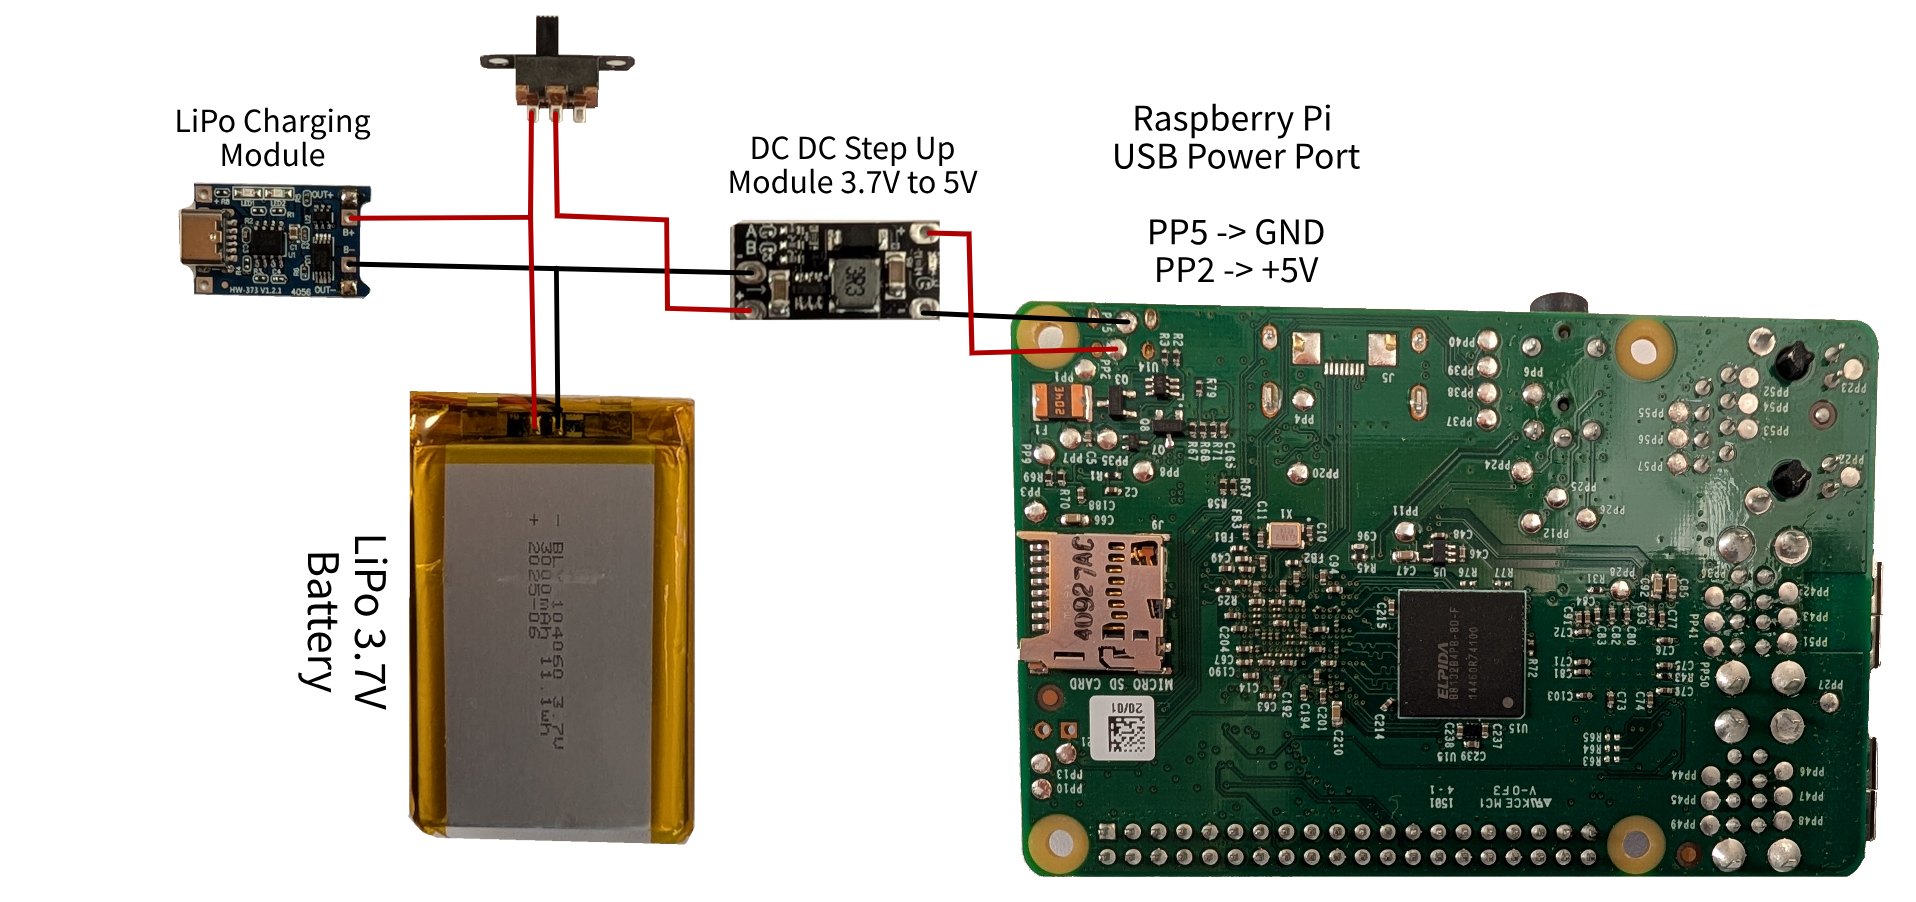
5. Solder the USB-C female charging module, sliding switch, LiPo battery, and the 3.7V-to-5V DC-DC step-up module together as shown.
(5.1. In our module, the output voltage had to be set using two solder bridges. Both bridges must be open.)
6. Place the assembled components into the case and glue the USB-C module and sliding switch in their respective openings.
(6.1. Insert foam into the cavity.)